How to not look terrible in a conference call. A makeup artist spills secrets.


IMG_5432

These days most of us aren’t wearing makeup (or indeed pants) except for during our zoom meetings/ skype calls/ FaceTime calls…but sometimes, we want to look decent. I know, it’s the apocalypse and frankly we are just grateful to be alive and have toilet paper, but if you wanna look decent on camera, this is what us makeup folk do. SPOILER ALERT: IT’S MORE MAKEUP THAN YOU NORMALLY WEAR. 

Step One: Decent lighting. 

IMG_2927

Half the reason this pic looks lovely- GREAT natural light. She’s also really pretty, I know! Makeup and photo by me using Becca cosmetics.

Repeat after me: sideways lighting makes you look older. Downlighting is also useful for making you look old, tired, and baggy eyed. There is no amount of makeup that can save you from horrendous lighting- it’s worth the effort to find a good spot. 

What you want is even, soft light. Usually the best is to sit facing a window when the sun is NOT streaming in directly. If you’re lucky enough to have a north facing window this means any time of day is good- for the rest of us, you just want the time of day the sun isn’t in front of that window ie west facing in the morning, east facing in the afternoon. 

Step Two: Double layer your foundation.

The aim of the game is to give yourself a blank canvas to work with so you can draw the eye where you want ( and away from redness/ under eyes circles/ that nice stress pimple). Apply one layer of foundation and let it air dry. Do the rest of your makeup and then put another layer of foundation over the top. Most cameras don’t pick up extreme detail ( unless you are using something very snazzy and not just your laptop/ iPhone like the rest of us) so you don’t need to worry about looking ‘cakey’. 

Step Three: Wear more Blush. ( and a bit of highlighter )

Have you ever seen a reporter on the street filming and noticed just how much makeup they are wearing? It’s HEAPS. Check your blush in a mirror standing at least 1.5 metres away ( we all know how far that is now )- it should still be visible at that distance. 

Step Four: Brows are a girl’s best friend. ( don’t worry too much about eyeshadow )

I know y’all love your eyeshadow ( I do too) but on camera, you don’t see it much. Basically all we see is the ‘frame’ – brows, lashes, lip. Define your brows by filling gaps first and stand back to check evenness of shape. 

Step Five : OODLES of mascara. ( and maybe some eyeliner )

Anyone who has had lash extensions can tell you: lashes make you look better. They make your eyes stand out, you look less tired, and your eyes look bigger. Fake it by triple layering your mascara- focus the mascara at the roots of the lashes to make whites of your eyes look brighter. Trace a fine line of liner as close as you can to your lash line to give you extra definition. 

Step Six: Lipliner is a necessity, not an option. 

Disappearing lips make us look tired. Do yourself a favour and make your lips stand out with a neutral lipliner and some gloss- doesn’t need to be dark but needs to be visible. I also recommend a bright lip ( if that’s your thing) to make the face look fresher- coral, pink and red are guaranteed to make you look like you didn’t spend last night stress eating an entire packet of ritz crackers ( not that there’s anything wrong with that). 

P.S. This is a hard time, and frankly if you wanna cry on the couch into your packet of crackers with no makeup on, that’s totally fine and I support you. Stay safe peeps ! xxx Ellen


How to: Sanitise and sort your makeup

75D1D08B-EC15-4A72-AD41-52DEB1E8A789Normally, writing about cleaning out your makeup bag is about as interesting as a misguided attempt at instagram live during lockdown, but in the current climate we all suddenly got REALLY interested in keeping things clean sooooooo…….

I want you to start by getting ALL of your makeup and ALL of your skincare and ALL your makeup brushes and sponges.  Rescue all the bits of makeup from your handbag/glove box/ bathroom drawer – ALL of it. Put it on a clean towel on a flat surface so you can see whatcha got. Take a moment to reflect on the ten year old lip smackers that really shouldn’t be there.

You will likely immediately realise that you have a BUNCH of stuff you never use. Before you start making resolutions to use up that old chemist bronzer you used one time- STOP.

WE ARE GOING TO THROW THINGS OUT. 

ANYTHING THAT’S OFF, YOU DON’T REALLY USE OR IS THE WRONG COLOUR……..CHUCK IT OUT LIKE A USED PAIR OF GLOVES YOU WORE TO THE SUPERMARKET.

The first thing we need to do is work out what’s gone off. Most makeup has a little picture of a jar on the bottom with an open lid and the markings ‘12M’ or ‘24M’ – that means, use 12 months from opening or 24 months from opening. I’m willing to bet that it’s rubbed off, and anyway, who knows when you bought it? March was about 3 years long so at this point time is an imaginary concept. 

This means, it’s gone off when:

  • lipsticks. Smelling weird, funny little white dots, odd grainy texture.
  • pressed powders ( including eyeshadows). Funny film of gunk on the top, odd grainy texture, discolouration. fun fact: THIS IS MOULD AND BUILT UP OIL AND DEAD SKIN. I advise against putting makeup oil dead skin mould on your face.
  • mascara. These have the WORST use by dates once open. Basically if you opened this before you heard of coronavirus, it’s time to bin it. Other tell tale signs include funky smell, flaky texture or making your eyes itchy. 
  • foundation. Anything in a pump or tube will last better ( because you don’t stick your fingers in it ) but for creams or sticks you only get about six months. Again, any funny smell or change or colour LET IT GO.
  • Glosses. Same comments as foundation. If you dip a little thing in it, put it on your lips, and dip it in again, keep it approx 3 months. if it’s a squeeze tube or you religiously use a spatula in a tub, about six months is fine. As always, if it smells weird, bin it.
  • Pencils. If the actual lead has shrunk away from the wood/ casing, it’s gone. Sorry. 
  • Skincare. Pumps and tubes, fine as long as they smell normal and are not obviously really old. Sunscreen should be less than six months old. Be ruthless with jars, anything you get reactions to, and anything that is not kept sealed properly. 

Now that we have thrown out half your makeup, it’s TIME TO CLEAN. Don’t pretend you’re not excited – you’ve been stuck in your house for weeks now so this is the most fun you’ve had recently.

  1. Wash all your brushes. A cake of old fashioned laundry soap ( Sard or Sunlight soap) is the best if you can get it- gets all the gunk out and disinfects as well. Don’t bother with baby shampoo or liquid soap- it just doesn’t do the job. Try not to get the handle wet, squeeze out excess water and lie them flat on a clean towel to dry. Sponges can go in the delicates bag in the wash- if they fall apart, they were old and needed to be chucked out anyway. Wash your pencil sharpeners in the cutlery section of your dishwasher. 
  2. Assess your actual makeup bag. There is a good chance it’s old and has a film of gunk on the inside. Unless you can wash it in clean soapy water or spray it with 70% alcohol, consider chucking it out. Fabric ones can also go through the washing machine in a delicates bag. Basically unless it’s in great condition and very clean, chuck it.
  3. Wipe your makeup over with a damp cloth – makeup up a solution with soap and water or a few drops of a disinfecting essential oil. Anti bacterial wipes are also great if you can get them. Wipe the outsides and insides of all compacts ( don’t get powders wet), shave the top layer of your lipsticks, sharpen all your pencils.
  4. Place items you actually love and use regularly back into your makeup bag. If you have items you can’t bring yourself to chuck out that you don’t use a lot, put them into a tray on your dresser to remind you to use them. If they are still sitting there unused in a month or so, let them go. 

Ask Ellen – Do I need… very expensive face cream?


I love a nice face cream. I love the nice jar and the feel and how it makes me glow and how it looks on my shelf and how my makeup looks nice over it PLUS want it to work and give me a whole new head and smell amazing and preferably bring me a coffee in the morning and bring world peace and the whole shebang. Consequently, my face cream costs enough to feed a small village for a year. #sorrynotsorry . I don’t have an expensive car or lots of shoes or diamonds or avocado on toast any of those things, but gosh darn I use a great face cream. ( That’s a lie. I do like a bit of smashed avo from time to time .)

I would prefer to eat 79c tuna from the discount bin at Woolworths than downgrade my key beauty products, but that’s just me. For many of us, we just want it to work and not require taking out a second mortgage.

The world of skincare is ridiculously complicated. Every skincare company on the market wants to convince you to buy their brand, and will make confusingly worded claims to get you to do so. For today, we’re going to stick to the topic of moisturiser, specifically.

Firstly, what is moisturiser anyway and why do we want/need it?

Here’s the dealio. The external layer of our skin turns over every 28 days or so. The new cells travel up from underneath and flatten out on the top, forming a nice protective layer. These cells travel through a little soup of natural moisturising factors called glycosaminoglycans ( GAGs) ( essentially, moisture with nutrients ) to get to the surface. When we don’t have enough GAGs, our skin’s ability to function effectively is compromised. This results in the outer layer looking flat, dull, and less bouncy.

Think of it this way- your skin is like a car, it needs oil and water to run its best.

The function of moisturiser is to ‘top up’ these moisture levels and keep your skin bouncy and smooth.

You can get moisturiser for $4 or $400+ – so what’s the difference?

The factors that affect price are as follows:

  1. Superficial – smells good, pleasant texture / smell / packaging / brand image / marketing ( this is the most expensive element )
  2. Active ingredients / quality of ingredients / scientific research and data backing up the efficacy – does something in addition to basic hydration ( this costs a medium amount of money ) . Actives really need a whole article of their own but essentially, you’re looking at ingredients like niacinamide, peptides, retinol, vitamin c, hyaluronic acid etc.
  3. Quality of basic ingredients that hydrate – this does not need to be super expensive.

This means, if you just want moisture and are not fussed about any additional features i.e. effective anti ageing, pretty packaging etc you can buy a nice, inexpensive moisturiser suited to your skin type and call it a day.

If you want great hydration AND anti ageing / pigment reducing/ face lifting / scar reduction you probably need to drop a few more $$ on something with active ingredients.

If you want hydration AND pretty packaging AND active ingredients, prepare to take out a second mortgage on your house coz it’s gonna cost you.

A word of caution: JUST because a cream is expensive doesn’t necessarily mean it is super effective for anti ageing and so forth – for that it needs to have great actives as well as a nice smell and a sexy jar.

Here’s my pick of some of the best in show,

Basic moisture with no frills $ ( may contain a small amount of actives but mostly just hydration ):

Normal skin

‘The Ordinary’ Natural Moisturising Factors + HA RRP $9.80 ( great hydration, great price. Don’t let the price tag put you off- this is a great product and well worth your time.)

natural moist ha

Dry Skin

‘Nivea’ The Original ‘Creme’ RRP $8.00 (  The mainstay of grandmothers with mysteriously perfect skin everywhere. Super thick, healing, and a cult favourite. Can be used on dry feet and elbows, too.)

nivea creme

Mature / Anti Ageing

Olay ‘Total Effects 7 in 1’ cream RRP $33.50 ( Moisture with some anti inflammatory/ anti pigment properties in the form of vitamin B3.  Does it do 7 things? ……no. It is decent? Yes.)

olay


Oily Skin / Young

Neutrogena ‘Hydro Boost’ Water Gel RRP $24.99 ( hyaluronic acid and a bit of glycerin- should leave your skin bouncy )

hydro-boost-water-gel_0_0.png


Active ingredients /  mid range $$

Normal Skin

Malin and Goetz ‘Vitamin E’ cream RRP $73 ( gorgeous smelling and super kind to sensitive skins, plus carrot extract to brighten. It’s also more than double the size of most moisturisers so great value.)

i-002127-vitamin-e-face-moisturiser-1-940

Anti Ageing

Philosophy ‘Renewed Hope in A Jar’ RRP $68 ( Made famous by Oprah – hydration with some resurfacing, entry level anti ageing . Cult fave.)

i-020582-renewed-hope-day-moisturiser-60ml-1-940

Dr. Dennis Gross ‘Ferulic and Retinol Fibroblast Anti Ageing Moisturiser’ RRP $105 ( ferric = anti pigmentation, retinol = faster skin turnover. Result? Smoother brighter skin.)

i-018476-ferulic-and-retinol-fibroplast-anti-aging-moisturiser-50ml-1-940

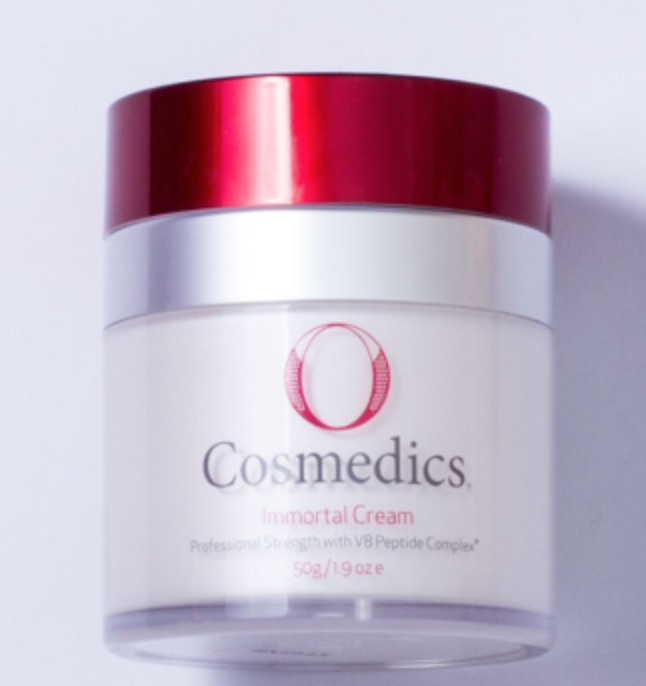
O Cosmedics ‘Immortal Cream’ RRP $102 ( Top notch cosmeceutical for a decent price. Anti ageing . Actually works. )

Screen Shot 2018-03-13 at 7.27.58 pm

Schnazzy pants gorgeous looking expensive moisturisers that actually do something $$$

Dry skin with sensitivity / scarring

La Mer, Creme de la Mer RRP $242- $665 ( Insanely expensive cream-of-joy . Originally a burns cream- works best on dry, red, or thinning skin. Not big on actives, but it works anyway.)

i-022577-creme-de-la-mer-30ml-1-940

Anti Ageing

Chantecaille ‘Nano Gold Firming treatment’ RRP $433 ( AKA ‘new head in a jar’. Stem cells + peptides + smells great + lifting )

i-010678-nano-gold-firming-treatment-1-378

Perricone MD Neuropeptide Firming Moisturiser RRP $398 ( This is for my girls who want a facelift. not super hydrating per se – more heavy lifting and tightening. )

i-006614-neuropeptide-firming-moisturiser-1-378


How to: Car Glam; Makeup Artist Style

I’m a huge fan of the car glam. In a universe, far, far away, we have time and products and amazing parties and unlimited budgets to get ourselves fabulous. In this universe: we are doing our eyeliner in the car before we try to find our other shoe in the boot somewhere. In addition to the usual touching up lippie and adding more mascara options that most of us do, I have a few extra tricks up my sleeve to make that emergency tjuzh more successful.

1. Whitening eye drops

This is so rarely done outside of makeup artist circles but it REALLY makes a difference. Whitening red eyes is the first thing a professional retoucher will do because it makes your whole eyes look better- plus it will make you feel better when you are overtired.

2. Whitening tooth strips

Like the eye drops, this seems overly finicky to lots of people ( I agree, it probably is, haha) but this is an essential for me. I pop one in before I drive and it’s dissolved by the time I arrive at my destination. Makes your breath smell better, too.

3. A brow powder and mini angle brush- used as eyeshadow as well.

Brows really are the frame of the face and it’s rare to have perfect ones naturally. I find that adding a bit of extra brow makes all the difference to lifting your grooming. take whatever shade you just used to touch up your brows and pop it under your eyes as a soft eyeliner- it will be super harmonious with your makeup and add subtle definition.

4. A mini ring light

Ok, so we are going into high maintenance area here but think about it.

Bad lighting= bad makeup.

It’s almost impossible to do a good job if you can’t see properly. I clip mine to the rearview mirror and use it to get my face balanced and beautiful.

5. Moisturiser

CAN I HAVE YOUR ATTENTION PLEASE. THIS IS A PUBLIC SERVICE ANNOUNCEMENT.

YOU CAN PUT MOISTURISER OVER YOUR MAKEUP AND THEN PUT MAKEUP ON AGAIN OVER THAT AND IT LOOKS FINE.

I know, it’s a bit of a shock but it’s true. If you have really oily skin you can even just stick more makeup over your makeup and it looks ok.  Bonus points: it stays on SUPER well doing it this way. You are welcome.


Stuff you shouldn’t be doing with makeup ( but probably are ).

1. Keeping it in the bathroom .

I know, I know. Probably the best light is in there, your room is small, you don’t want makeup on your carpet etc. I get it. Here is the problem. There is LOTS of moisture in the air in the bathroom, and it tends to breed mould, as well as get into your powders and make ‘em sticky. Think about this: the cleaning products you use for the bathroom are hard core- because the environment tends to breed mould. Mmmmm. MOULDY POWDER. MOULD. DELICIOUS MOULD. SO NICE. MOULDY MOULDY FACE. That, my friend, is what is breeding on your makeup. Top tip: get a pretty makeup bag to store your makeup elsewhere, and just carry it in there when you need it. It’s easier to find what you need, and it will stay nice longer.

2. Using old mascara .

Let’s all say it together. Con-Junc-tiv-itis. The preservative systems in mascara are designed to work properly for three months, after which the Bacteria start escalating. If your mascara is old, smells funny, or is flaky, THROW IT OUT. And, while we are at it, don’t share it ( or any eye product ) with anyone. ( unless you don’t like them and you actually WANT to give them an eye infection in which case WHAT IS WRONG WITH YOU BUT ALSO HILARIOUS BUT ALSO DON’T DO THAT.)

3. Not washing brushes, sponges, or the little powder puffs in your compact .

Ok. Have you ever had a powder product that has a film of weird grainy stuff on it? Wanna know what it is? Let me give you the breakdown. Makeup brushes touch your skin. Your skin has oil and gunk and dead skin cells floating around on it. When you put your brushes into a product ( say, eyeshadow) you are actually transferring that oil and gunk into that eyeshadow pan, where it breeds bacteria. This forms a sticky, grainy layer on top of your products. Noice. This lovely layer can also be achieved by sticking sticking your fingers directly into a powder shadow, or putting a dirty powder puff back on top of a pressed powder. Schmexy, no?

4. Keeping perfume in the car or direct sunlight.

It goes off faster. Enough said. Perfume should be kept like wine-in a cool, dark area. HELPFUL HINT: keeping your perfume somewhere hot is a great way to make very fragrant vinegar. ENJOY.

5. Concealing first, then adding foundation over the same area.

I don’t know who started this, but it needs to stop. When you apply liquid foundation over concealer, you tend to move the concealer off whatever it was you wanted to cover. This means you then have to go back and apply more concealer after foundation- making your makeup thicker and less even. Apply foundation all over and then see what you need to cover- you can even mix concealer and foundation to ensure a seamless match. The exception: colour correctors can be used under foundation, provided you stipple your foundation super carefully over the top to avoid dislodging the corrector. Oh, and while we are at it. Using pale concealer to cover pigmentation doesn’t work- it just looks ashy. Orange corrector is your new friend, followed by a matching concealer. You are welcome.

6. Dipping the mascara wand into the bottle lots of times.

I’m just going to do a tutorial on how to get a great result out of your mascara because this annoys me so much. Short version: keep brushing your wand through your lashes to spread the product evenly, rather than just dipping back in for more product and then wondering why it’s clumpy and lame and does not look like the commercial at all and now you need to take half of it off with an old eyebrow brush and it’s flaking under my eyes and why does my mascara hate me I give up. ( you know the commercial is photoshopped, right? )

7. Pumping the wand.

This puts air in the tube and it dries out faster. Geez- what did YOU learn in school?

8. Pulling your eyelids when applying eye makeup.

Just tip your head back a la Sophia Loren so you can SEE what you are doing without distorting your eye shape and prematurely stretching the skin on your eye.

9. Applying bronzer all over.

Contrary to its name, powder bronzer is NOT designed to take your whole makeup one shade darker. It’s designed to ‘shape’ the face by selectively adding warmth on cheekbones, bridge of the nose, or décolleté to simulate a sun kissed effect. The ONLY time you should consider using bronzer all over is if you are super tanned and it actually matches your face.

FAQ: what if my face is paler than my body? Can I just use darker foundation? Glad you asked. NO YOU CANNOT. Using dark foundation without actually having a tan underneath just looks orange- ask any ballroom dancer. If you are fake tanning, tan your face too. Fake tan changes the ‘base’ of your skin ( think: pink face, yellow body ) and NO amount of darker foundation will give an accurate match. I know, you are in the habit of not tanning your face because you heard it’s ageing….they are talking about sun damage, not fake tan. Oh, and these days you can get beautiful hydrating organic DHA fake tan that actually leaves your skin feeling beautiful.

N.B. If you sunbake and do not tan your face (… why are you ok with sun damage on your body? STOP. IT.) Then you can use a liquid bronzer on your face to bring your natural colour up a shade, as your natural base is still the same undertone as your sun damaged body.

Feel bad yet?

AUTHOR’S NOTE: At the end of the day, it’s your makeup, and you can do whatever you wish. PAINT YOUR FACE PURPLE AND SHOUT ‘ I AM THE LIZARD QUEEN !!!!’ if that makes you happy. Hope this article gave you a giggle and hopefully inspired you to de-gunk your makeup, I’d love to hear what you think! Xx Ellen